Nose Cone
Follow this link to check my article about the 2014 nose cone rules and designs.
|
|
| |
Early History
Long time ago, when aerodynamics were not so important, driver safety was small man talk and not in use in F1, the nose cone (front of the car in those times) was not an important piece of car structure. Constructors’ main aim was to make the car look aggressive and cool, and to house the engine and radiators. Nothing more and nothing less.
Today, the nose cone or nose box is designed principally for aerodynamic efficiency, but it must also comply with several strength and dimensional rules set by the FIA. It must not only absorb energy in the event of a head-on collision but also support the front wing.
Nose cone of BRM P160 (1973), Tyrrell 006 (1973) and McLaren M19 (1973) side by side
Driver Safety and Crash Structures
Let see first about driver safety
It should be noted that the same principles apply to the rear crush structure as well. The rear impact structure hangs behind the gearbox and often supports the rear wing.
In a Formula 1 crash, thousands of carbon fibre shreds can often be seen flying in all directions, giving the impression that the crash was enormous and extremely dangerous. An F1 nose cone or rear crush structure falls apart relatively easily compared to the monocoque. Only the driver’s safety cell and a select few other components remain intact after a crash.
That is the entire point. In the event of an accident, the nose cone and rear crush structure serve as sacrificial crash structures.
Every component fitted to the safety cell – nose cone, sidepods, rear wing, suspension, rear crush structure, and so on – is designed to deform and disintegrate in a controlled way upon impact.
The goal is to reduce the impact energy and the negative acceleration (deceleration) acting upon the driver.
Tyre walls perform a similar job. They typically consist of a rigid steel barrier or wall, covered in deformable tyres or barrels filled with water.
Altogether, a tyre wall will deform by about a metre, while the car’s crush structure may deform by about half a metre (roughly the length of the nose cone).
Construction and Materials
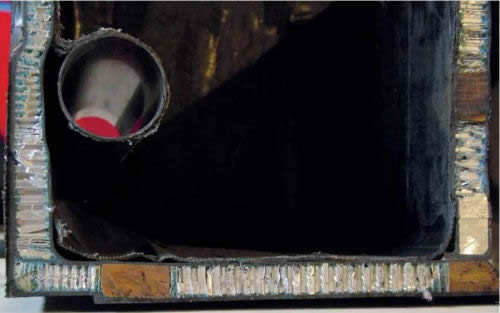
Made of carbon fibre impregnated with resin as an outer skin, with honeycomb cores and a thinner inner layer of carbon fibre, the nose breaks inward to absorb a frontal crash. The structure is laminated to provide the most effective energy-absorbing properties. During construction, individual layers of carbon fibre are arranged so that nose cone deformation and the car’s deceleration are controlled progressively. The beauty of composite construction is that plies can be placed exactly where they need to be to optimise the load-bearing requirement.
The properties of carbon fibre components depend heavily on the characteristics of the original materials (pre-impregnated, weave type, unidirectional, low density, high density, etc.) and the manufacturing process. While it is common to say that carbon fibre is a certain number of times stronger than steel and lighter as well, in general terms this is true – it can be made that strong and light – but that does not mean that every component is manufactured to those maximum specifications.
In an accident, the function of the carbon fibre is to absorb as much of the impact energy as physically possible. Carbon fibre does this by first deforming and then shattering in a carefully calculated manner, rather than transmitting shock waves through the entire monocoque structure to the driver. This is why all the shards of carbon fibre fly everywhere during a crash.
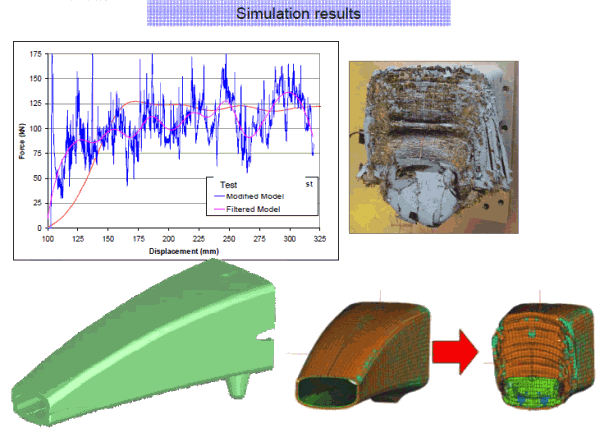
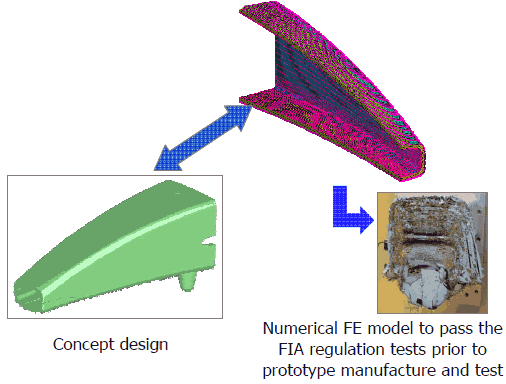
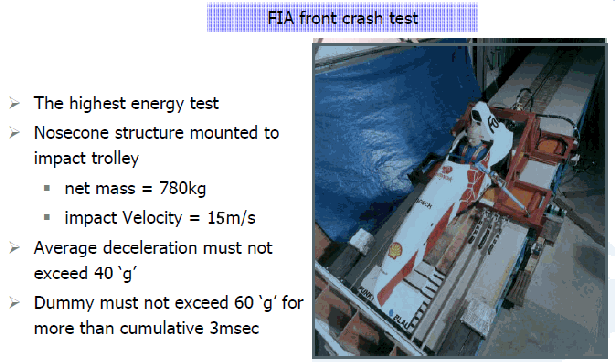
Crash Testing
Each new nose box design must pass two mandatory crash tests: a static side load test and an impact test. In these tests, the nose box is fitted to a monocoque – complete with a driver dummy and fuel tank full of water – mounted on a trolley and crashed into a wall. To pass the test, all the energy must be absorbed by the nose box, with no damage to the monocoque or dummy.
The test speed of 15 metres per second (54 km/h) may seem slow compared to the speeds at which a Formula 1 car travels, but during the test the car is effectively hitting an immovable brick wall. On circuit, the crash barriers absorb a significant portion of the energy, so not all of it is absorbed by the nose box alone. Upon impact, the carbon fibre essentially turns to dust.
For more information about crash testing, see the “Crash test” page.
Ballast Regulations
There was another safety issue affecting drivers, marshals, and the public. Since F1 cars have a minimum weight set by the FIA and all teams build lighter cars, they can move ballast around the car to where it best serves performance. The tip of the nose is an attractive location since it sits ahead of the front wheels, with the distance between the front wheel axis and the ballast acting as a lever.
The extra weight in the noses became a serious danger by 2005. If an accident occurred and part of a nose cone was thrown onto another car or into the crowd, the additional weight would increase the potential for damage. From 2006 onward, the FIA imposed a ban on ballast weight inside the nose cone. Nevertheless, teams still use front wings or front wing endplates to position some additional ballast in specially made slots.
Aerodynamic Characteristics
And now about aero characteristics
A set of rules in both the bodywork and chassis regulations dictate the geometry of the nose cone. Ultimately, the nose is an aerodynamic feature, but one largely influenced by the need to pass a range of crash tests and to act as a mounting point for the front wing. The FIA controls the overall position, height, and size of the bulkheads in front of the driver’s feet. This area is defined by the dimensions of the front bulkhead (FIA section A-A), along with the bulkhead’s distance from the cockpit opening.
Height and cross section in this area are critical, as teams want a minimal cross section between the front wheels and as much space as possible underneath to fit bodywork that directs airflow around and under the sidepods. Teams therefore tend to raise these bulkheads as high as regulations permit. They also tend to have an angled upper surface on the nose cone and a “V” cross section at the front bulkhead, making the surfaces more aerodynamically efficient.
The nose tip must meet a minimum and maximum tip height, meaning that the area 50 mm behind the actual tip must be centred at a predefined height above the car’s reference plane (the bottom of the stepped floor). The cross section at the tip must be 9,000 mm2 or more, which equates to a 97 mm square or 107 mm diameter circle, but the actual shape is relatively free within these parameters. In terms of length, the nose cannot be shorter than the front wing centre section and can extend forward beyond the front wing.
The High Nose Revolution
At first glance, a higher nose generates less downforce on its own, as it pushes less air up over the nose. However, one area of the car in particular attracted constructors’ attention: the underbody airflow. While true ground effect designs had been banned during the 1980s, the contemporary practice of coupling a flat, stepped chassis undertray with a large rear diffuser meant that many cars still produced a significant proportion of their downforce through the generation of a low-pressure air mass underneath the car.
What Harvey Postlethwaite (at the time Tyrrell Racing’s lead designer) and his team realised was that the efficiency of this low-pressure generating system was being seriously compromised by the low nose position at the front of the car. Low nose cones effectively diverted air sideways and upwards around the car’s upper bodywork, reducing the volume of air passing underneath. However, the generation of low pressures relies on increasing the speed of the air passing underneath the car relative to air passing over and around it. A high nose allows air to flow straight under the nose instead of having to go around it. While this reduces drag, all the air that passes under the nose is then guided under the car or split to either side by the splitter located just in front of the sidepods.
In simple terms, the more air that can be drawn underneath a car, the faster that air has to move, and the faster the air moves, the lower the pressure (remember Bernoulli?).
Tyrrell 019
By raising the nose cone, Postlethwaite and his team increased the volume of air able to pass underneath the car. Conversely, the efficiency of the front wing aerofoil increases the closer it is to the ground. These conflicting requirements led to the distinctive inverted V, anhedral front wing profile of the Tyrrell 019. Postlethwaite left the centre section below the nose tip without any aerofoil, further freeing the path for fresh, undisturbed air to feed the undertray and diffuser.
With improvements in aerodynamic research, constructors further refined these designs. Before the regulation changes of 2008, the front wing ran the full width of the car, with the section below the nose tip further increasing front wing downforce. Teams used different wing profiles in this area, with the most common being the so-called “spoon” profile.
Today, the central section of the wing below the nose has a standardised profile for all cars, must be flat, and cannot produce any downforce.
Managing Front-End Airflow
With regulations around what designers can do at the rear of the car more tightly controlled than ever, the front naturally receives increased attention. Teams focus on improving airflow over the car, seeking lower drag and higher downforce. In the case of the nose cone and front wing, there are the attachment pylons – which vary considerably from car to car – and then the wing’s flap and end plates.
By managing the nose cone and front wing, designers are managing the airflow that feeds the rest of the car, including its downforce-generating surfaces and other features. Often, more performance can be gained by managing the flow that arrives at downstream components than by developing those components directly. The front of the car is now a highly critical area where teams seek very small improvements.
Quick-Release Nose Systems
Sometimes, after accidents and damage to the nose cone or front wing, mechanics must change the entire assembly very quickly. It is a matter of seconds, race position, points, and ultimately the championship. Over the years, teams have used different methods to fix the nose to the monocoque, with the most obvious being bolts. While bolting the nose in place was very secure, in an emergency pit stop following a front wing shunt, the mechanics would take far too long trying to replace the damaged nose. Teams used to keep a couple of small air guns in the pit lane, set aside and reserved just in case of a possible nose change.
John Barnard was a perfectionist whose attention to detail is legendary. His Benetton 1991 F1 car, the B191, featured some fine details. Typically, the radiator sidepod covers of a Grand Prix car are secured to the chassis with a number of individual bolt fixings around the edges of the pod. However, as the sidepods are removed two or three times each day of a race weekend, this becomes tedious and time-consuming – plus there is always the risk of rounding an over-tight bolt during removal. Barnard’s team developed a flush-fitting quick-release catch. Operated by a special two-pronged key, this simple but brilliant design feature enabled both sidepods to be removed from the chassis in a matter of seconds.
/Big/nose_cone_quarter_turn_fastening_big.jpg
2013 Toro Rosso parts of the quarter turn fastening system that hold the nose onto the chassis (picture of Toro Rosso’s youtube video of a factory tour)
One feature of Barnard’s Benetton car that has been copied onto every Formula 1 car in the pit lane is his quick-release catch for the nose and front wing assembly. The idea was based on the plastic snail-cam fasteners found in quick-build kitchen units available at large DIY warehouses. A dowelled peg is pushed into the body of the snail-cam, and an Allen key turns the cam through 180 degrees, locking the two parts together. Other teams were still using bolts, though most soon adopted the alternative once they noticed it. Williams Grand Prix Engineering continued using bolts the longest but eventually fitted their own version of the Barnard nose catch.
The Tyrrell 019: Birth of the High Nose
But let’s see how all this high nose thing started
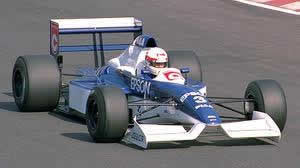
The Tyrrell 019 was the first F1 car to feature an elevated nose cone. This was the first time such an idea had been tried in Formula 1, and it set the direction for F1 car design that continues to this day. The car was introduced two races into the 1990 Formula 1 season, scoring a point on its debut in the hands of Jean Alesi. This type of nose cone was gradually adopted by other teams. The car was powered by a 3.5-litre Cosworth DFR V8, a descendant of the legendary Cosworth DFV.
The Tyrrell 019 was designed by Harvey Postlethwaite and built by the Tyrrell racing team. It was an evolution of Postlethwaite’s first design for Tyrrell, the 018. Taking the 018 as his base, Postlethwaite decided to improve the aerodynamic efficiency of the chassis. He was an experienced F1 engineer, having previously built race-winning cars for Hesketh, Wolf, and Ferrari, and was well placed to identify the shortcomings of his own design.
However, this was an early and primitive form of the high nose, as several important aspects of the concept were not yet well understood. As the years progressed, the mechanical components became smaller and smaller, increasing the advantages of a compact high front nose. By 1996, all low-nosed cars had disappeared in favour of the higher alternative.
In practice, the car did not achieve results commensurate with its technological impact. Although Alesi qualified a strong seventh and took a point for sixth place at its first race in San Marino – and then both qualified and finished second in Monaco – the remainder of the season produced only two points finishes. Nevertheless, as other teams experimented with the principle, the high nose rapidly became the norm. After this car, all Formula 1 championship-winning chassis followed Tyrrell’s lead.
The Tyrrell 019 was replaced at the end of the 1990 season by the Tyrrell 020, a further evolution of Postlethwaite’s high nose principle.
The Last Great Low-Nose Car

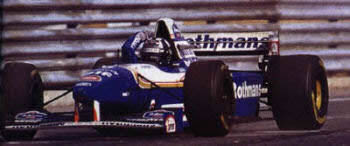
The last truly competitive low-nose car was the Williams FW15, built only four years after the Tyrrell 019’s debut. While Alain Prost won the 1993 championship in his comeback
year, the following year’s Williams FW16, driven by Ayrton Senna in 1994, was still very competitive but was outraced by Benetton’s Michael Schumacher, who took his first championship. Prost holds his place in the history books as the last driver to win the championship with a low-nosed car.
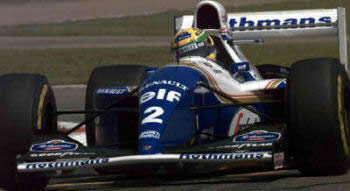
Williams and its chief designer Adrian Newey implemented a high nose with their 1995 challenger. The Williams FW17 was a runner-up in the hands of Damon Hill and powered the team to championship victories in the following two years.
2012 Regulation Changes
The FIA’s 2012 Technical and Sporting Regulations prescribed that car noses be lowered to 550 mm above the reference plane (previously they could be 625 mm high). This change was made to ensure that all parts of the nose sit definitively below the height of the cockpit sides in the event of a T-bone type crash.
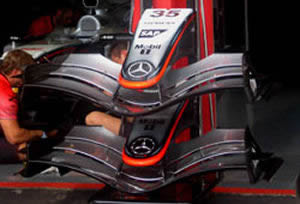
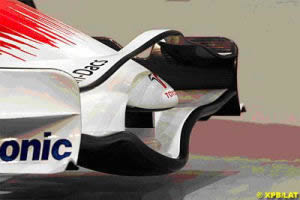
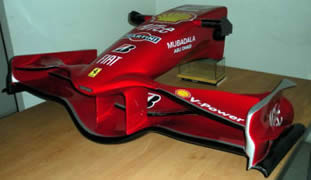
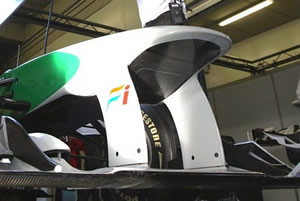
Gallery of Nose Cone Designs
A selection of different nose cone designs
Design of 2010 nose cones
|
|
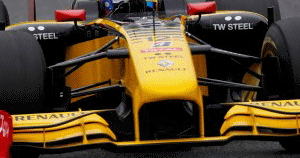
Force India nose cone, 2010 | Renault nose cone, 2010 |
|
|
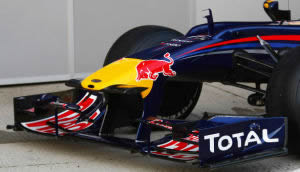
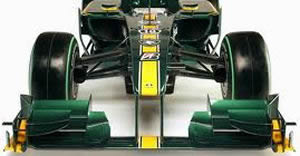
Red Bull RB6 Nose cone 2010 | Lotus nose cone, 2010 |
|
|
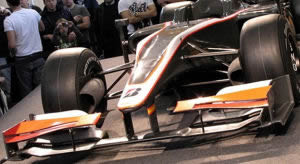
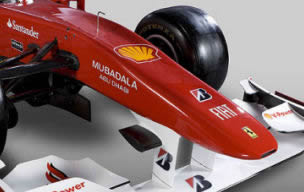
Hispania Racing Team nose cone, 2010 | Ferrari 2010 nose cone |
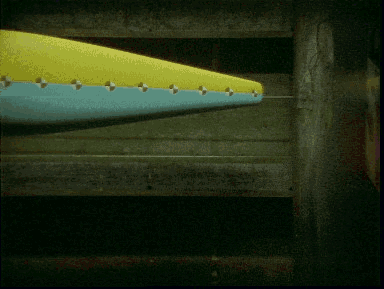
A1GP car frontal crash test
Follow this link to check my article about the 2014 nose cone rules and designs.